By guest blogger Scott Mead
Photographer Scott Mead winds up his three-part series on how to get the perfect image of your work.
Now that we have all the pieces to the product photo puzzle, it’s time to make some magic, and we’ll take it step-by-step.
Set the stage
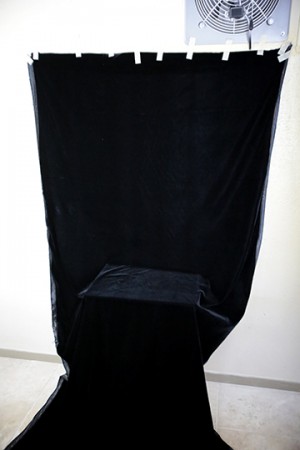
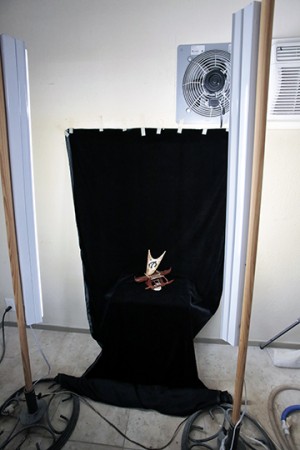
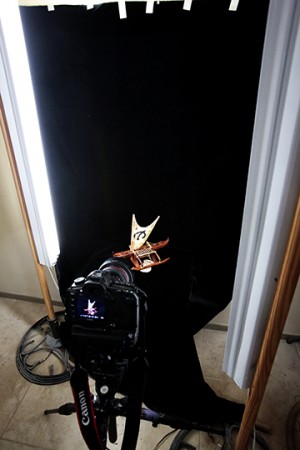
For this example, we’re going to use a simple, but quite effective setup, with a small table against a wall and a couple yards of black velvet. Tape one end of the velvet to the wall with masking tape, and allow it to hang and drape the rest over the table. To give the background a smooth transition, let the velvet at the back of the table gently curve from the wall to the table. Place your art in the middle of the table.
Bring in the lights
Now we’ll place our modified florescent lights into our umbrella stands, plug them in, and let the bulbs warm up for at least 15 minutes. To start, place the lights at opposing 45-degree angles to your piece, so that the light crosses the other’s path and eliminating shadows. Leave the lights there for now. We’ll come back to them in a bit.
Camera Time
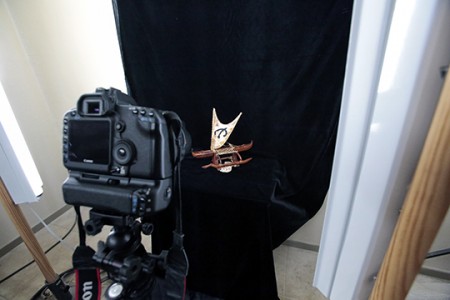
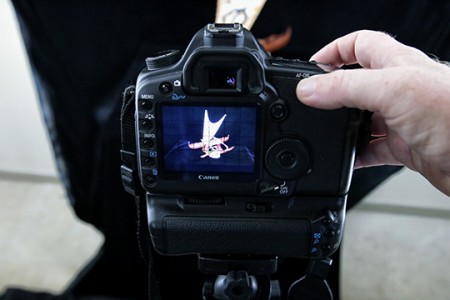
Pull out your tripod, and extend the legs so that the top of the head is level with the table top and attach the camera. Now’s the time to double check the settings on your camera: Shooting mode to Aperture Priority, ISO, set to 100, the flash is turned off and Exposure Metering to on Center-weighted. Be sure the camera is set to capture in high resolution jpeg mode, the self-timer is on and the white balance is set to either 5,000 Kelvin or “daylight.” Move the camera and tripod toward the stage, leaving about a three-foot distance between your piece and the camera.
Composing the Frame
Now that we have our baseline setup, it’s time to compose our first image. I usually like to start with an overall shot of the piece, then work in to the details. We’ll begin by turning the piece about 30-degrees (about an 1/8th of a turn) from dead-in to the lens. This will give your work a sense of depth to the light and background. After all, we want a dramatic looking image, not a mug shot, right? Now, frame the shot to include the entire piece, and be sure to leave some “breathing room” on the top, bottom and sides.
Last Tweaks
There’s a couple final adjustments to make before taking our initial image: set the lens’ aperture f/18 for good depth of field, and set the focus to the middle of your piece. Push the shutter button down half-way until the camera focuses and you hear the confirmation “beep.” Then, depress the button fully to start the self-timer and remove your hand from the camera. In the 10 seconds before the camera takes the shot, any vibration from you touching the camera will fade away, and the image will be nice and sharp.
Ka-Click, Wow
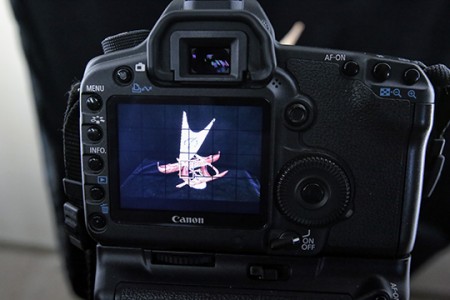
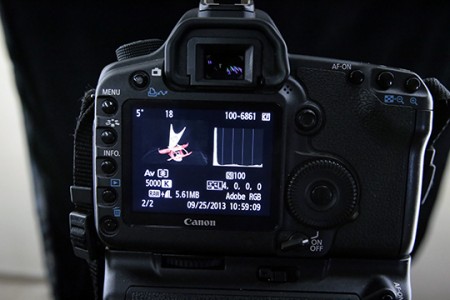
After the shutter closes, a miraculous thing happens. Inside your camera, the image sensor converts the light that it saw (the image) into a mass of ones and zeros, then sends it to a microprocessor (called the processing engine) which works with some pretty sophisticated algorithms to determine the color spectrum of the image, the highlight-to-shadow ratio, and in milliseconds, develops the image. In what seems like an instant, the picture you just took appears on the camera’s screen.
Depress the “Play” button to bring the image up on the screen of your camera, and give it a look. Your piece should be evenly lit, and there may be a few highlights or glare (shiny spots) or shadows that add to the depth and allure of your piece. Sometimes, we might want the highlights in a different place (or not at all), or deeper shadows (or none at all). So let’s play with the light.
Light Play
Here’s where we have fun, getting the light just right for each individual piece, and the options are almost endless. One of the easiest ways to eliminate glare is to slowly turn the offending light away from the piece, softening the light. Sometimes, highlights can draw attention to a special aspect to a piece, such as a facet on a gem or an intricate weave pattern.
To emphasize the highlight, move the light in closer, and aim it towards that special feature. We can also create additional drama by moving one of the lights to the side of the piece to create side or “key light,” which highlights the form and dimension of the subject. Every time you move your lights, take another image. Within a few shots (and by moving your lights), you’ll have several good shots, and a few great ones as well.
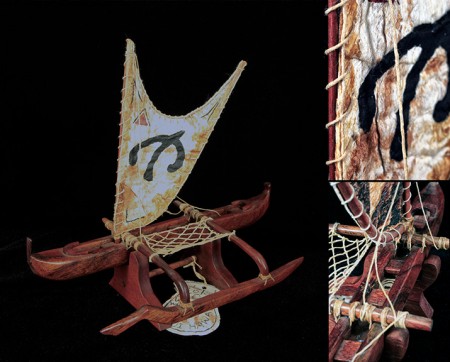
Details Make the Difference
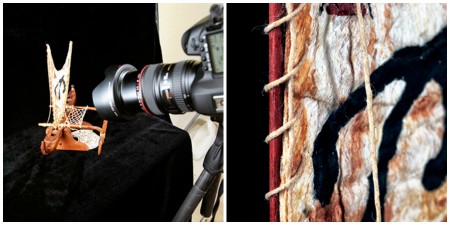
With our main image shot, we now want to show our customers the little details that make a piece special, but more importantly, illustrate the value that’s built in. Select a portion of your piece that best demonstrates a particular technique, a unique attribute or is just plain cool.
Zoom in on that feature (or move the camera closer if the lens is fixed), and select the camera’s “macro” mode to engage close focusing. If you’re using a DSLR, the lens will automatically swing to the macro focusing, so long as the lens you have supports macro shooting. Use the same techniques outlined earlier to get the lighting right where you want it. I always suggest photographing two-to-three different details to give the viewer a good sense of the piece you’re presenting.
Reaping the Rewards
Now you have your piece photographed. It took a little work, but the results were worth it, especially if you look at all the benefits of doing your own photography. If a gallery calls, requesting an image of a new piece for a client, you’ll be able to get images to them quickly. As soon as a new work is completed, you can photograph it and have it up on your Web site in no time. And keep in mind of the money you’ll save over enlisting the services of a professional photographer. That alone can easily add up to thousands of dollars of savings each year, but more important, it’s more profit for you.
Don’t miss Part 1 and Part 2 of this series by Scott Mead.


Great article, Scott, thank you.