by Peggy Farren
When selling art, presentation is key. You need excellent images, ideally taken by a professional photographer. If that’s not feasible, use these tips to photograph your artwork yourself.
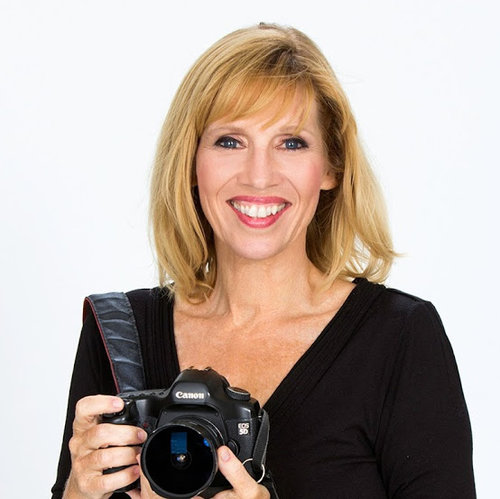
Photographer Peggy Farren
Yes, it’s possible to produce beautiful images of your art by yourself. You can use a point and shoot or even one of the newer cell phones and still come up with photos that can work for you.
Equipment needed:
One must have piece of equipment is a tripod. You must have super sharp pictures. Most blurry pictures are caused by camera shake. Put your camera on a tripod. If you do not have a shutter release cable, use your timer on 10 seconds. Even pressing the shutter button to take the picture can cause camera shake. If you use the timer, in 10 seconds the camera should be still enough for a sharp picture.
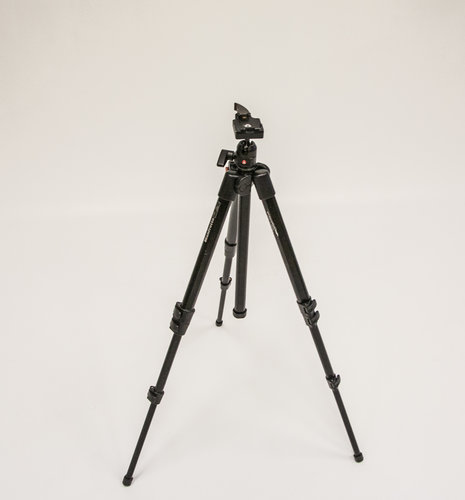
Tripods are essential for taking the best photos of your art.
Composition
Background: If photographing a painting or 2D subject, fill the frame from edge to edge. It’s probably best to photograph a little wide and then crop the picture using a photo editing software. The chances of your camera having the same dimensions of your painting are slim, but by cropping with photo editing software, you can still fill the frame.
For 3D objects, you are an artist – so be creative! If you can come up with an appropriate background that will help showcase your art, try it. If not, a simple seamless background is best. You can purchase seamless paper through an internet photography store. If you have small pieces, you can use a poster board.
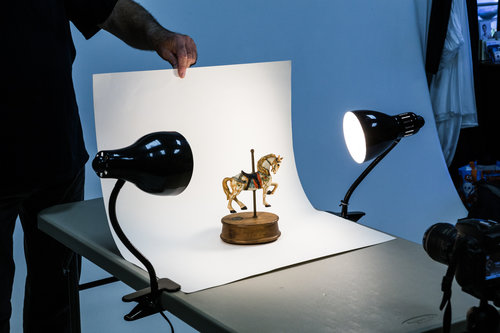
Suggested background setup for your photo shoot.
You really don’t need a fancy background holder for your seamless paper. You can tape it to a wall or an easel. Be sure to use gaffers tape, which won’t leave a sticky residue.
Take pictures of different angles of your piece until you find the one you like the best. Use reflectors or other lights to light up dark parts of your subject. With 3D, you’ll want some shadows to help show the depth of your piece.
Lighting
The word photography literally translates to “writing with light.” The correct lighting is essential when photographing your art pieces.
Two dimensional pieces
For paintings and two dimensional pieces, you’ll want even lighting, which we as photographers call “flat” lighting. Most artists are not equipped with a photography studio with fancy light modifiers, but many have a really good source of soft even lighting – sliding doors or a large window. Choose the best time of day for soft, diffused light to come in to your window. If you have a north or south facing window, the light should be nice midday. If your window faces west or east, you’ll have to wait until the light is not blasting in.
Use soft diffused natural light for your photos.
If you can hang your painting, that’s best since you want to evenly light your art piece. If you put the picture on an easel, it will be on a slant. You’ll need it upright for even lighting.
Three dimensional pieces
If you are a sculptor, jeweler or 3D artist, you’ll want directional lighting to show the detail in your piece. This can be a window light as well or you can use “daylight balanced” fluorescent lights. You may want to purchase reflectors to help you control exactly where the light is hitting your subject.
If you decide on artificial lighting, you’ll have to diffuse them in some way or the light will be too harsh. You can use “scrims” or white fabric in front of the light to diffuse and soften it. Have a helper hold the scrim so they can move it around as needed.
You’ll want to show shadows, but avoid any very dark areas of your piece. Try turning the piece to photograph it at different angles. You may like one angle better than another.
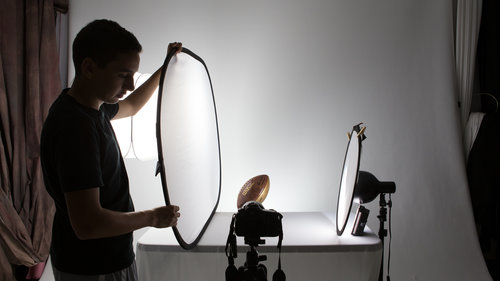
Using a scrim can help to soften and balance light for your photos.
Color and color temperature.
Accurate color is vital when photographing your art. Don’t take your pictures in a colorful room. Choose a room with white, beige, grey or black so that the color doesn’t reflect on to your piece.
Turn off all artificial lights in your space before lighting your subject. You don’t want the yellow color of tungsten lighting or the blue of normal fluorescent lights polluting the light you’ll need for photography.
If you are purchasing artificial lights, look for “daylight balanced” lights for nice color. Window light in the middle of the day will probably be the right color temperature. If you photograph at sunrise or sunset, you’ll have a yellow tint to your photos.
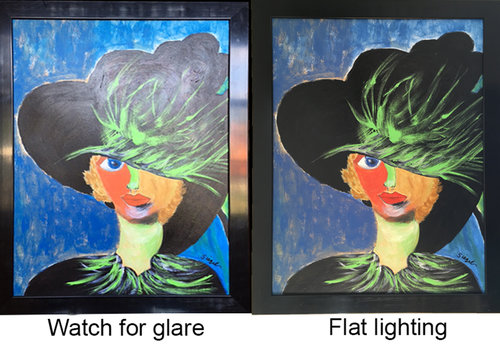
Glare is a problem that can ruin the quality of your portfolio photos. Artist credit: Carole Siegel
Have your mentor or other artists critique your photographs
Sometimes when we work on something for a long time, we don’t see the flaws. Before uploading your pictures for a juried show or sending them to a printer, have someone look at them. You may not see the color cast or perhaps you didn’t notice that the picture is too dark. Artists tend to be a helpful bunch, so network and befriend others.
Yet another option is to hire a professional photographer to help you set up an area where you can photograph your art. At Understand Photography, we often set up small “photo studios” for our customers and teach them what they need to know to photograph their products. We’ve set up small photo studio areas for a chef at a fancy country club, a guitar dealer, a sculptor, custom shotguns, heavy machinery and several jewelers. Just be sure to hire a professional who specializes in product photography. Yes, there is an initial cost, but once you are set up you should be able to photograph your pieces as you finish them.
Peggy Farren has been a professional photographer for over 18 years.


Great article.
One added suggestion: be sure that the camera lens and the artwork are absolutely parallel to each other. Otherwise, the photo of the artwork will be distorted.
Thanks for that additional tip, Larry!
Awesome, great tips and article. I really needed the advice.
Do not use your phone to photograph your artwork if you wish to make prints.
Online could be fine but not to make reproductions. Don’t jeopordize the reputation you have built over your career but selling subpar reproductions.
Great point, Jeff! It’s not always obvious to artists that their phone images are not sufficient for reproductions. A professional photographer or art printer making a scan are better options.